Blog Details
Home Blog Details
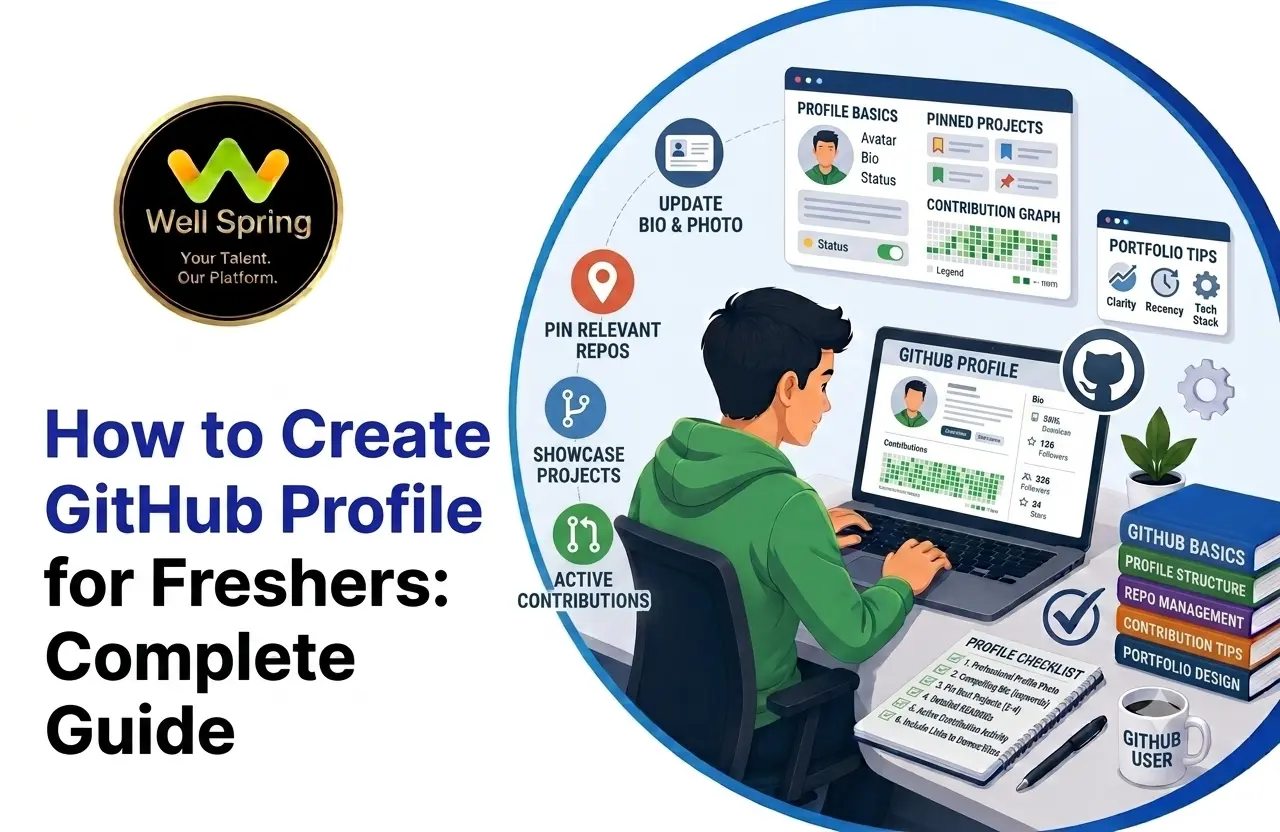
A professional GitHub profile can help freshers and students demonstrate their programming skills, projects, learning progress, and practical experience to potential employers. This guide explains how to create a GitHub profile, optimize it professionally, choose the right projects, write effective repository READMEs, build a GitHub portfolio, and avoid common mistakes that can weaken your profile. Whether you are starting your first coding project or preparing for your first IT job, you can use GitHub to turn your technical learning into visible career evidence.
To create a professional GitHub profile as a fresher, start by creating a GitHub account with a professional identity, complete your profile, create a profile README, upload relevant projects, document your repositories, pin your strongest work, and keep your profile updated.
A simple process is:
Create Account → Complete Profile → Add README → Build Projects → Document Repositories → Pin Best Work → Connect Portfolio → Keep Improving
The goal is not to make your GitHub profile look busy.
The goal is to make it easy for someone to understand what you know, what you have built, and how seriously you approach development.
GitHub itself describes the profile as a place where users can showcase their work, contributions, and information they choose to share. It also provides features such as profile READMEs and pinned repositories to highlight selected work.
For a fresher, one of the most difficult parts of entering the IT industry is proving practical ability.
You may have completed a degree.
You may have attended programming courses.
You may have earned certifications.
You may even know Python, Java, JavaScript, SQL, React, or another technology.
But during recruitment, an important question remains:
This is where GitHub can become valuable.
A well-maintained GitHub profile gives you a place to demonstrate your coding projects, document your learning, organise your repositories, and provide evidence of your technical work.
That doesn't mean every recruiter will evaluate GitHub in exactly the same way, or that having a GitHub account automatically improves your chances of getting hired.
What matters is what your profile contains.
An empty profile doesn't say much.
A profile containing copied tutorial projects doesn't necessarily say much either.
But a profile containing relevant projects, clear documentation, meaningful development activity, and work you can confidently explain can become a useful part of your professional profile.
For students and freshers, this is particularly valuable because projects can help demonstrate practical skills when professional experience is still limited.
WellSpring Talent Solutions also emphasises practical projects, internships, hands-on learning, mentoring, resume development, and career preparation as part of its broader student-to-career journey.
Before learning how to create a GitHub profile, it helps to understand what GitHub actually does.
GitHub is a platform for hosting and collaborating on software projects using Git-based version control.
For a beginner, several terms are worth understanding.
Git
Git is a version-control system used to track changes in code and other files.
GitHub
GitHub provides an online platform where Git repositories can be stored, shared, and collaborated on.
Repository
A repository, often called a “repo,” is a project space containing your files, code, documentation, and related development history.
Commit
A commit records a set of changes made to a repository.
Branch
A branch provides a separate line of development, allowing changes to be worked on without immediately modifying the main branch.
README
A README is a documentation file that explains a project.
Profile
Your GitHub profile brings together your public information, repositories, contributions, and selected work.
Understanding these basics will make the rest of the process much easier.
Now let's move to the practical part.
Create an account using a professional email address where appropriate.
Your username becomes part of your professional online identity, so avoid usernames that look like gaming handles, random numbers, or temporary accounts.
For example:
Better:
arun-kumar
arunkumar-dev
Less professional:
coolboy1999
kingofcoding12345
You don't need a complicated username.
A simple, recognisable identity is usually easier to connect with your resume and other professional profiles.
GitHub allows you to customise several profile elements, including your name, profile picture, bio, contribution activity, pinned items, and other information.
Start with the basics.
Add Your Name
Use the name that matches your professional profiles where appropriate.
Add a Professional Photo
A clear, professional image can make the profile feel more complete.
You don't need an elaborate studio photograph.
Write a Specific Bio
Avoid vague descriptions such as:
Passionate coder | Tech lover | Future entrepreneur
Instead, communicate your current direction.
For example:
Computer Science Student | Python & Django Learner | Interested in Backend Development
Or:
Aspiring Full-Stack Developer | React, Node.js & SQL
Your bio should quickly communicate where you're going professionally.
Add Relevant Links
If you have a professional portfolio, LinkedIn profile, personal website, or other relevant professional resource, connect it where appropriate.
One of the most useful profile customisation features is the profile README.
GitHub displays this README at the top of your profile when the required conditions are met.
According to GitHub's documentation, you can create a public repository whose name exactly matches your GitHub username and place a README.md file in its root. GitHub then displays that README on your profile.
How to Create It
GitHub's own documentation confirms that the profile README is designed to let users introduce themselves and highlight relevant work or contributions.
Your README should not become your autobiography.
Keep it useful.
A simple structure can be:
About Me
Briefly explain who you are and what you're currently working towards.
Current Focus
Mention the technologies or areas you're learning.
Technical Skills
Group your skills logically.
For example:
Languages: Python, JavaScript, Java
Frontend: HTML, CSS, React
Backend: Django, Node.js
Database: MySQL, PostgreSQL
Tools: Git, GitHub, VS Code
Featured Projects
Highlight a few projects that represent your strongest work.
Current Learning
Mention technologies you're actively developing.
Contact
Link to appropriate professional channels.
Remember that your README should support your portfolio rather than repeat every detail from your resume.
GitHub profile optimization is not about making your profile look artificially active.
It is about making the information already there clearer, more relevant, and easier to evaluate.
Optimise Your Username
Keep it professional and recognisable.
Write a Specific Bio
Make your career direction clear.
Create a Profile README
Use it to introduce yourself and highlight your strongest work.
Pin Your Best Projects
GitHub allows you to pin repositories and gists so that selected work is more prominent on your profile.
GitHub's own resume guidance recommends highlighting a small selection of your strongest projects and notes that pinned repositories are prominently displayed for people reviewing your profile.
Improve Repository Documentation
Don't make visitors guess what your project does.
Keep Projects Relevant
Your featured repositories should support your target career.
Remove Weak Public Work
If a repository is incomplete, duplicated, irrelevant, or purely experimental, consider whether it needs to be prominently visible.
A GitHub profile for freshers does not need years of professional experience.
You can build it around practical evidence.
Consider including:
However, don't upload everything simply to make your contribution graph look busy.
Ask:
Does this repository demonstrate something useful about my technical ability?
If the answer is no, it may not belong among your featured work.
You don't have to wait until final year.
A student can start building a GitHub profile as soon as they begin learning programming.
Early Stage
Start with:
Skill-Building Stage
Move towards:
Career Preparation Stage
Start focusing on:
By graduation, the profile can show a progression rather than a sudden collection of projects created just before job applications.
This aligns with a broader principle WellSpring highlights in its student-focused content: projects become more useful when learners continuously improve them and use them as evidence of practical skills.
Your profile may look professional, but recruiters and technical reviewers may eventually open individual repositories.
That's where documentation becomes important.
A useful repository should answer basic questions quickly.
1. What Is This Project?
Give a one- or two-sentence explanation.
2. Why Was It Built?
Explain the problem or objective.
3. What Technologies Were Used?
List the important technologies.
4. What Can It Do?
Describe key features.
5. How Can Someone Run It?
Provide installation and setup instructions where appropriate.
6. What Does It Look Like?
Screenshots or a live demo can be useful for visual applications.
7. What Could Be Improved?
Mention future enhancements if relevant.
This information belongs in the repository README.
Compare these two descriptions.
Weak README
This is my Python project. I made it while learning Python.
It tells the reader almost nothing.
Stronger README
Expense Management Application
A Python-based application that allows users to record, categorise, and review personal expenses. The project uses Python for application logic and SQLite for data persistence and was created to practise CRUD operations, database integration, and input validation.
Now the reader understands:
That's the purpose of documentation.
GitHub's documentation also provides Markdown guidance for creating and formatting READMEs, making it possible to structure project documentation clearly without requiring complicated tools.
Your GitHub projects for freshers should reflect your career direction.
Don't choose projects simply because someone on YouTube called them “top projects.”
Choose projects that demonstrate skills employers are likely to care about for your target role.
Beginner Projects
If you're just starting:
These can demonstrate programming fundamentals.
Intermediate Projects
Once your fundamentals are stronger:
These can demonstrate databases, APIs, authentication, and application structure.
Advanced Projects
For a stronger portfolio:
The project itself is not what makes it impressive.
Your implementation is.
Before adding a project to your GitHub portfolio, evaluate it using six questions.
Problem
What problem does it solve?
Functionality
What does the application actually do?
Technology
Which technologies did you use?
Complexity
What makes it more than a basic tutorial?
Evidence
Can someone inspect the code or run the project?
Explanation
Can you explain how you built it?
Think of the process as:
Problem → Functionality → Technology → Complexity → Evidence → Explanation
If you can answer all six, you have the foundation for a strong project presentation.
Following a tutorial is a perfectly reasonable way to learn.
The problem comes when the tutorial project becomes the final portfolio piece without meaningful personal work.
Suppose you follow a tutorial to create a basic task manager.
Instead of uploading it unchanged, challenge yourself to add:
Now you're not simply demonstrating that you followed instructions.
You're demonstrating that you can extend and understand an application.
And if you publish it, be honest about how it was developed.
GitHub Portfolio for Developers: How It Fits Into Your Career Profile
A GitHub portfolio for developers works best as part of a larger professional ecosystem.
Think of the relationship this way:
Resume → Professional Summary
LinkedIn → Professional Identity
Portfolio Website → Project Presentation
GitHub → Technical Evidence
Live Demo → Working Proof
These platforms should reinforce one another.
For example, if your resume says:
Junior Python Developer
your GitHub should ideally contain projects demonstrating Python-related skills.
If your portfolio highlights React development, your GitHub should contain relevant frontend work.
Consistency makes your profile easier to understand.
There is no single universal recruiter process.
Different companies and hiring teams use GitHub differently.
However, a reviewer may look for signals such as:
Relevance
Do your projects match the role?
Technical Ability
Does the code demonstrate genuine understanding?
Documentation
Can someone quickly understand the project?
Ownership
What did you personally contribute?
Development Practice
Does the repository show a sensible development process?
Communication
Can you explain technical decisions clearly?
Consistency
Does the profile support the claims made on your resume?
The most important principle is simple:
Don't build your GitHub profile for a contribution graph. Build it for credibility.
|
Before |
After |
|
Random username |
Professional username |
|
No bio |
Clear career direction |
|
Empty profile |
Useful profile README |
|
Random repositories |
Curated projects |
|
No documentation |
Detailed READMEs |
|
Tutorial copies |
Personalised projects |
|
No project links |
Working demos where appropriate |
|
No featured work |
Strong repositories pinned |
|
Unclear skills |
Skills supported by projects |
|
Inconsistent resume/profile |
Consistent professional identity |
This is what meaningful GitHub profile optimization looks like.
A common mistake is believing that a green contribution graph automatically makes a profile impressive.
It doesn't.
You should not create meaningless commits simply to make your activity graph look active.
Instead, use GitHub naturally:
Your activity should reflect actual learning and development.
One of the most important habits to develop early is protecting sensitive information.
Never upload:
A public repository can expose information that should never have been published.
Before making a repository public, review the files you are committing.
Learning GitHub should also mean learning responsible development practices.
A GitHub profile becomes more meaningful when it grows alongside practical experience.
A useful development cycle is:
Learn → Practise → Build → Receive Feedback → Improve → Document → Showcase
Internships can add another layer:
Learn → Practise → Build → Intern → Gain Experience → Document → Showcase
WellSpring Talent Solutions describes its internship programs around practical learning, live project experience, mentor guidance, technical development, career preparation, and resume/portfolio building.
That means learners can think about GitHub from the beginning of their training rather than treating it as a last-minute requirement before placement applications.
Not every classroom assignment needs to become a public repository.
Choose projects that can demonstrate something useful.
For example:
Classroom Assignment
Create a basic student management application.
Improved GitHub Project
Add:
Then write a README explaining the project.
The difference is significant.
The first demonstrates that you completed an assignment.
The second demonstrates how you developed and improved a technical solution.
If your GitHub profile is currently empty, don't try to transform it overnight.
At the end of the month, the goal isn't a perfect profile.
The goal is a credible starting point that you can continue improving.
1. Creating a Profile and Leaving It Empty
An account alone doesn't demonstrate technical ability.
2. Uploading Only Tutorial Projects
Tutorials are useful for learning but shouldn't be your entire portfolio.
3. Using Poor Repository Names
Names such as project1, finalproject, or newproject2 provide little context.
Use descriptive names.
4. No README
A good project without documentation can be difficult to understand.
5. Uploading Incomplete Work
If a project is unfinished, either complete it, clearly label it as work in progress, or keep it private until it is ready.
6. Committing Secrets
Never expose passwords, tokens, or API keys.
7. Listing Technologies You Don't Understand
Your GitHub profile should support your resume—not contradict it.
8. Pinning Too Many Weak Projects
Feature your strongest work.
9. Ignoring Code Quality
A working application is good.
Readable, organised and maintainable code is better.
10. Making Fake Commits
Don't manipulate activity merely to create a greener graph.
Build genuinely.
11. Not Explaining Team Contributions
If a project was built by a group, clearly explain your own contribution.
12. Forgetting to Update the Profile
Your GitHub should evolve as your skills evolve.
Before sharing your profile with recruiters, ask yourself:
Can someone understand who I am and what role I'm targeting?
Can they quickly find my strongest work?
Can they understand each project without contacting me?
Does the code support the skills listed on my resume?
Can I explain what I personally built?
Does my GitHub match my resume and LinkedIn?
If the answer to all six is yes, your profile is already moving in the right direction.
Profile
Projects
Security
Career
Creating a GitHub account takes only a few minutes.
Creating a professional GitHub profile takes more thought.
For freshers and students, the goal should not be to make the profile look busy. It should be to make your technical progress visible.
Start with a professional identity.
Complete your profile.
Create a useful README.
Build projects that match your career direction.
Document them properly.
Pin your strongest work.
Connect GitHub with your resume and professional portfolio.
Then keep improving as your skills grow.
The most useful mindset is:
Don't collect repositories. Build evidence.
A strong GitHub portfolio for developers should help someone understand what you can build, how you approach technical problems, and what you have learned along the way.
If you're a student or fresher building those skills through structured training, use every meaningful project as an opportunity to create something you can eventually showcase. WellSpring Talent Solutions' current approach combines practical training, projects, internships, mentoring, resume and portfolio support, and career preparation, helping learners connect technical learning with practical career development.
Your GitHub profile doesn't need to prove that you know everything.
It needs to prove that you learn, build, document, improve, and can explain your work.
Start with one good project.
Document it properly.
Then build the next one.
Over time, your GitHub profile can become a visible record of the developer you're becoming.
15 Oct 2026
15 Oct 2026
14 Oct 2026
14 Oct 2026
13 Oct 2026
Create a GitHub account, choose a professional username, complete your profile, add a useful bio, create a profile README, upload relevant projects, document your repositories, and highlight your strongest work.
Yes. GitHub can provide a place for freshers to demonstrate projects and practical coding work, particularly when they have limited professional experience.
Yes. Students can start building their profile while learning and gradually add academic, personal, internship, open-source, and career-focused projects.
Focus on relevant projects that demonstrate your programming and technical skills. These can include academic projects, personal applications, training projects, internship work, hackathon projects, and open-source contributions.
There is no fixed number. A few strong, relevant and well-documented projects are generally more useful than a large collection of unfinished or copied projects.
Improve your username, bio, profile README, project selection, repository documentation, pinned repositories, professional links, and overall consistency with your resume and career direction.
It can include a short introduction, career interests, technical skills, current learning, selected projects, achievements, and professional contact links.
Examples include expense trackers, task management applications, student management systems, REST APIs, e-commerce applications, dashboards, automation tools, and other projects related to the role you want.
Yes, if the project is suitable for public sharing and you can explain your contribution. Improve the documentation and make your own work clear.
No. Curate your profile. Highlight work that demonstrates relevant skills and represents your current ability.
No. GitHub and a resume serve different purposes. A resume summarises your professional background, while GitHub can provide technical evidence through projects and repositories.
For technical roles, including a relevant GitHub profile can be useful when it contains meaningful, presentable work.
Start with personal or academic projects. Build small applications, improve them gradually, document them properly, and move towards projects aligned with your desired career path.
Activity can show that you use GitHub, but the number of contributions alone does not demonstrate technical ability. Genuine projects, code quality, documentation, and relevant work matter more than artificially increasing activity.
Get internship updates, IT training news, placement opportunities, and career tips directly to your inbox.
Join our WhatsApp community for internship updates, IT courses, placement support, and latest job opportunities.
Join Now