
Blog Summery:
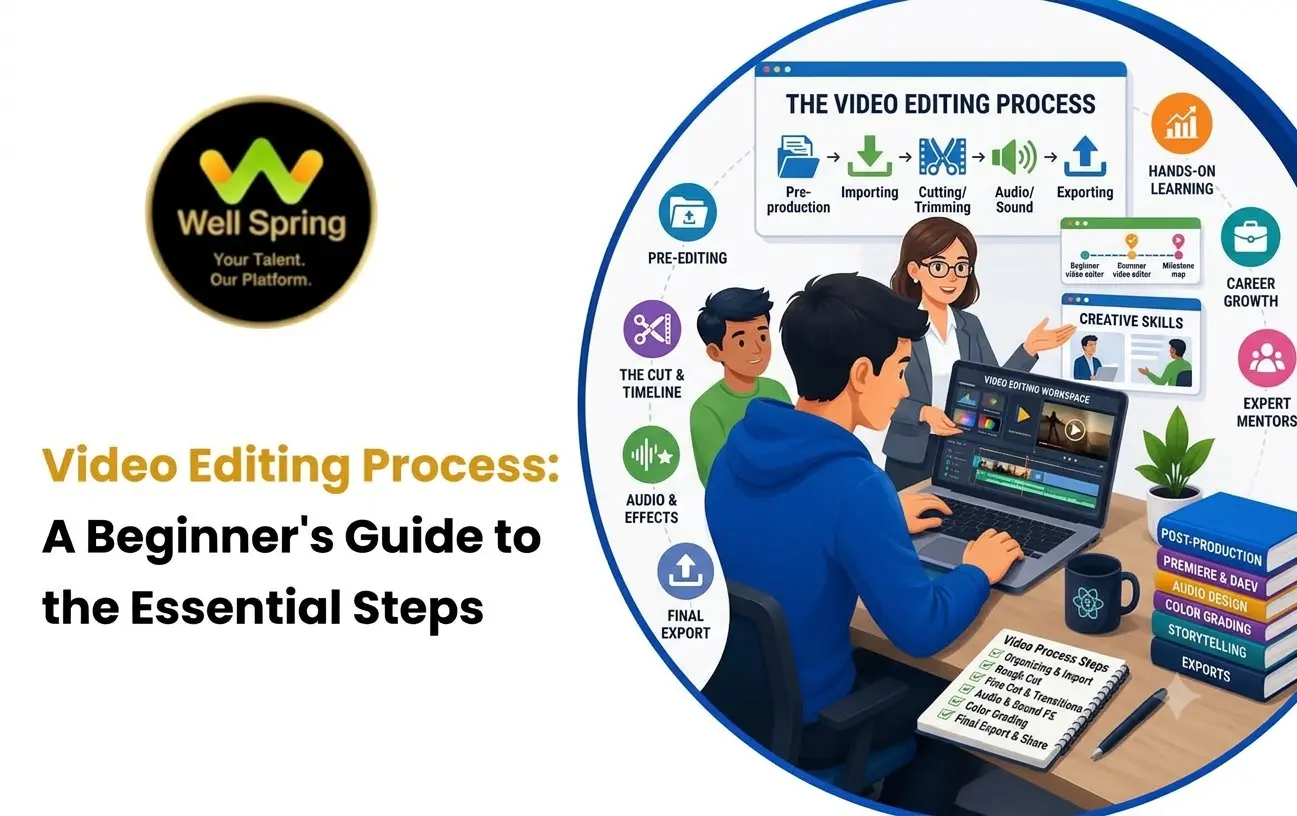
The video editing process is a series of steps used to turn raw video footage into a complete and engaging video. It typically involves planning the video, organizing footage, selecting the best clips, creating a rough cut, refining the timeline, editing audio, correcting color, adding graphics, reviewing the project, and exporting the final video.
For beginners, understanding the basic video editing steps can make the entire process easier to manage. A structured workflow helps you stay organized, save editing time, maintain consistency, and create videos that are easier for viewers to follow.
Whether you are creating YouTube videos, social media content, tutorials, interviews, promotional videos, or short films, understanding how video editing works can help you approach each project with greater confidence.
Quick Answer: What Is the Video Editing Process?
The video editing process is the workflow used to transform raw footage into a finished video. The main steps are:
- Plan the purpose and structure of the video
- Organize your footage and project files
- Review and select useful clips
- Create a rough cut
- Refine cuts, timing, and pacing
- Edit and balance the audio
- Apply color correction
- Add transitions, titles, captions, and graphics
- Review the complete video
- Export the final project
The exact workflow can vary depending on the type of video, editing software, footage, and platform where the video will be published.
What Is the Video Editing Process?
The video editing process is a series of tasks used to transform raw video and audio files into a finished video.
A typical editing project involves:
- Planning the purpose and audience
- Organizing video and audio files
- Reviewing and selecting footage
- Creating a rough edit
- Arranging clips on a timeline
- Refining cuts and pacing
- Editing and balancing audio
- Correcting visual color
- Adding titles and graphics
- Reviewing the final video
- Exporting the finished project
The goal is not simply to join video clips together. Video editing involves making decisions about timing, storytelling, audio, visual consistency, and how information is presented to viewers.
Why Is a Video Editing Workflow Important?
A structured video editing workflow allows you to approach a project step by step instead of trying to complete every task at the same time.
A good workflow can help you:
- Keep project files organized
- Find important footage quickly
- Reduce unnecessary editing
- Improve video pacing
- Maintain consistent audio and visuals
- Avoid missing important details
- Complete projects more efficiently
- Make revisions easier
For beginners, following a consistent workflow can also make editing software easier to understand because each stage has a clear purpose.
Video Editing Process: 10 Essential Steps
1. Plan the Purpose and Structure of the Video
Before opening your editing software, understand what the video is about, who will watch it, and what you want viewers to understand or do.
Think about:
- The purpose of the video
- The target audience
- The main message
- The expected video length
- The platform where it will be published
- The basic structure of the content
For example, a tutorial might follow a structure such as:
Introduction → Main Topic → Demonstration → Explanation → Conclusion
Planning the basic structure before editing can help you make better decisions when selecting footage and arranging clips.
2. Organize Your Footage and Project Files
The next step in the video editing process is organizing your files.
After recording a video, you may have multiple clips, audio recordings, images, music files, logos, graphics, and other assets. Keeping these files organized before editing can save time later.
You can create folders such as:
- Video Footage
- Audio
- Music
- Images
- Graphics
- Project Files
- Exports
If a project contains footage from multiple cameras, you can also create separate folders for each camera or recording session.
Good file organization becomes especially important when working on longer or more complex projects. It also makes it easier to locate original footage if you need to make changes later.
3. Review and Select Your Footage
Once your files are organized, review the available footage.
Watch the clips and identify the sections that are useful for the final video. You may find footage that is:
- Blurry
- Repeated
- Out of focus
- Unnecessary
- Too long
- Recorded by mistake
Selecting useful footage before building the main timeline can make the editing process more efficient.
For longer recordings, markers or labels can help you identify important moments quickly. This is particularly useful for interviews, tutorials, events, and multi-camera projects.
4. Create a Rough Cut
The next stage is creating a rough cut.
A rough cut is an early version of the video where selected clips are arranged in a logical order. At this stage, the main focus is structure rather than small visual details.
For example, a tutorial video might follow this structure:
Introduction → Main Topic → Demonstration → Explanation → Conclusion
A rough cut helps you determine whether the overall story, message, or sequence makes sense before spending time on detailed editing.
Avoid spending too much time on transitions, animations, or visual effects at this stage. The structure should work before you focus on finishing details.
5. Refine the Timeline and Improve Pacing
After creating the rough cut, begin refining the timeline.
This is one of the most important video editing steps because timing and pacing can significantly affect how viewers experience a video.
You may need to:
- Shorten clips
- Remove unnecessary pauses
- Improve scene order
- Adjust the timing of cuts
- Remove repeated information
- Improve the flow between scenes
- Keep important moments long enough to understand
For example, removing unnecessary pauses from an interview can make the conversation feel smoother without changing the main message.
Small changes to timing can have a noticeable effect on the overall pace of a video.
6. Edit and Balance the Audio
Audio is an important part of the video editing workflow.
Viewers may tolerate simple visuals, but unclear or inconsistent audio can make a video difficult to watch. Good audio editing helps dialogue, music, and sound effects work together without competing for attention.
Basic audio editing may include:
- Removing unwanted sounds
- Adjusting volume levels
- Cleaning dialogue
- Balancing background music
- Adding sound effects
- Reducing distracting noise
When a video contains dialogue, make sure the speaker's voice remains clear and easy to understand.
For example, if background music is louder than the speaker's voice, reduce the music level so the dialogue remains clear.
Background music should support the video without overpowering the main audio.
7. Apply Color Correction
After the main editing and audio work, you can improve the visual consistency of your footage.
Color correction can involve adjustments such as:
- Exposure
- Brightness
- Contrast
- White balance
- Saturation
The purpose of color correction is to make footage look balanced and consistent.
For example, if two clips were recorded under different lighting conditions, color adjustments can help them appear more consistent when placed next to each other.
Color Correction vs. Color Grading
These two terms are related but serve different purposes.
Color correction focuses on making footage look balanced and consistent. This can include correcting exposure, white balance, contrast, and other visual inconsistencies.
Color grading focuses more on creating a particular visual style, mood, or appearance after the footage has been corrected.
Beginners should first understand basic color correction before moving into more advanced color grading techniques.
8. Add Transitions, Titles, and Graphics
Once the main edit is working well, you can add visual elements that support the content.
Transitions
Common transitions include:
- Cut
- Fade
- Dissolve
- Wipe
- Dip to black
A simple cut is often enough when moving between related shots. Transitions should be used when they help communicate a change in scene, time, location, or topic.
Using too many transition effects can distract viewers and make the video feel unnecessarily complicated.
Titles and Graphics
Depending on the type of video, you might add:
- Opening titles
- Captions
- Subtitles
- Lower-thirds
- Logos
- Section headings
- End screens
- Simple animations
When adding text, focus on readability. Use suitable font sizes and keep important information on screen long enough for viewers to read it.
9. Review the Complete Video
Before exporting, watch the complete video from beginning to end.
This is an important part of the video editing process for beginners because small mistakes can easily be missed while working on individual clips.
Check for:
- Audio problems
- Spelling mistakes
- Sudden cuts
- Missing clips
- Incorrect graphics
- Volume changes
- Color inconsistencies
- Unnecessary sections
- Timing issues
Watching the entire project as a viewer can help you identify problems that may not be obvious while editing individual sections.
If possible, review the video on the device or platform where your audience is likely to watch it.
10. Export the Final Video
Once the editing is complete, the final step is exporting the video.
Export settings depend on where the video will be published.
Before exporting, check:
- Video resolution
- Frame rate
- Aspect ratio
- File format
- Audio settings
- Video quality
- File size
The appropriate format and dimensions can vary depending on the platform. For example, a horizontal video intended for YouTube may use a different aspect ratio from a vertical video created for short-form social media content.
It is also useful to keep the original project file so that you can make changes later if necessary.
Example: Editing a Video From Start to Finish
Understanding the process becomes easier when you see how the individual stages connect.
Imagine you are editing a five-minute YouTube tutorial.
Step 1: Plan
Decide the topic, audience, key points, and basic structure.
Step 2: Organize
Separate the recorded footage, voice recordings, music, images, graphics, and project files.
Step 3: Select
Review the raw footage and keep the clips that contribute to the tutorial.
Step 4: Rough Cut
Arrange the selected clips in the correct sequence.
Step 5: Refine
Remove long pauses, repeated information, mistakes, and unnecessary sections.
Step 6: Audio
Clean the dialogue and balance music and other sound elements.
Step 7: Color
Correct noticeable differences in exposure, white balance, or color between clips.
Step 8: Graphics
Add titles, captions, section headings, or other useful graphics.
Step 9: Review
Watch the complete five-minute video and correct remaining issues.
Step 10: Export
Choose the appropriate resolution, aspect ratio, frame rate, audio settings, and file format for the intended platform.
This example shows why editing is more than simply cutting clips together. Each stage contributes to the final viewing experience.
Video Editing Workflow for Beginners
A simple video editing workflow for beginners can look like this:
Plan → Organize → Select → Rough Cut → Refine → Audio → Color → Graphics → Review → Export
Beginners do not need to master every editing feature at once. Start with the fundamentals and gradually introduce more advanced techniques.
Step 1: Understand the Purpose of the Video
Before opening your editing software, understand what the video is about, who will watch it, and what you want viewers to understand or do.
Step 2: Organize Your Files
Keep footage, audio, music, images, graphics, and project files organized in separate folders.
Step 3: Select the Best Clips
Review your footage and remove clips that do not contribute to the final video.
Step 4: Build the Rough Cut
Place the selected clips in a logical sequence without spending too much time on visual effects.
Step 5: Refine the Edit
Improve timing, pacing, cuts, scene order, and unnecessary pauses.
Step 6: Work on the Audio
Clean dialogue, balance volume, and add appropriate music or sound effects.
Step 7: Correct the Visuals
Adjust color and visual consistency where necessary.
Step 8: Add Titles and Graphics
Include captions, titles, logos, lower-thirds, or other useful visual elements.
Step 9: Review the Project
Watch the entire video and correct remaining issues.
Step 10: Export
Choose suitable export settings based on where and how the video will be published.
Common Video Editing Mistakes Beginners Should Avoid
Using Too Many Transitions
Transitions should support the video rather than distract from the content. In many situations, a clean cut is more effective than a complicated effect.
Keeping Unnecessary Footage
Long pauses, repeated clips, and irrelevant sections can affect the pacing of a video. Remove footage that does not contribute to the story or purpose.
Ignoring Audio Quality
Poor audio can reduce the overall quality of a video, even when the visuals are good. Pay attention to dialogue clarity, volume levels, background music, and unwanted noise.
Overusing Effects
Visual effects should have a purpose. Adding too many effects can make a video harder to follow and distract viewers from the main message.
Skipping the Final Review
Always watch the complete video before exporting. A final review can help identify mistakes that were missed during editing.
Poor File Organization
Disorganized footage can make it difficult to find clips, manage revisions, and work efficiently on larger projects.
What Software Is Used for Video Editing?
Different video editing applications provide tools for cutting footage, editing audio, adding graphics, adjusting colors, and exporting videos.
Some commonly used video editing software includes:
| Software | Common Use |
|---|---|
| Adobe Premiere Pro | Professional video editing and post-production |
| DaVinci Resolve | Video editing, color correction, and post-production |
| Final Cut Pro | Video editing on Mac |
| CapCut | Short-form and social media video editing |
| Adobe After Effects | Motion graphics and visual effects |
The right software depends on your project requirements, experience level, device, and the type of editing you want to perform.
Beginners do not need to learn every tool immediately. Starting with importing footage, timeline editing, basic cuts, audio adjustments, text, and exporting can provide a strong foundation.
How Long Does the Video Editing Process Take?
The time required for video editing depends on the project.
A short social media video may require relatively little editing, while a long-form YouTube video, documentary, interview, or promotional video may take much longer.
Editing time can depend on:
- Amount of raw footage
- Final video length
- Number of camera angles
- Audio quality
- Number of revisions
- Graphics and animations
- Color correction
- Sound design
For example, editing a short video with a single camera angle may require fewer steps than editing a multi-camera interview with separate audio recordings and graphics.
As you gain experience, a consistent video editing workflow can help you work more efficiently because you spend less time deciding what to do next.
Conclusion
Learning the video editing process becomes easier when you follow a structured workflow.
Start by understanding the purpose of the video, organizing your footage, selecting the best clips, creating a rough cut, refining the timeline, improving audio, correcting visuals, and adding useful graphics. After reviewing the complete project, you can export the final video for your chosen platform.
With regular practice and a consistent video editing workflow, beginners can gradually become more comfortable with editing tools and develop the practical skills needed to create clear, engaging, and well-structured videos.
If you want to develop practical video editing skills through structured learning and hands-on projects, exploring a dedicated video editing course can help you build your editing foundation and apply these steps to real-world projects.